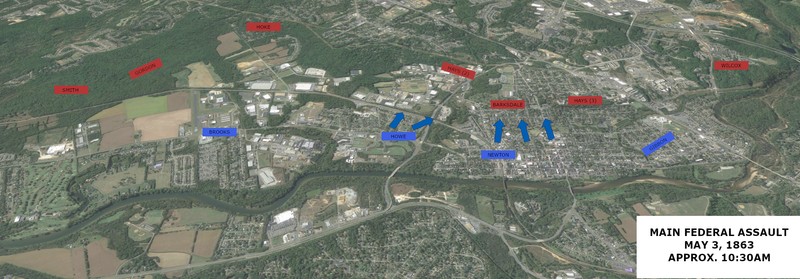
The Federal Assault on Marye's Heights, May 3, 10:30am
Introduction
Text-to-speech Audio
Images
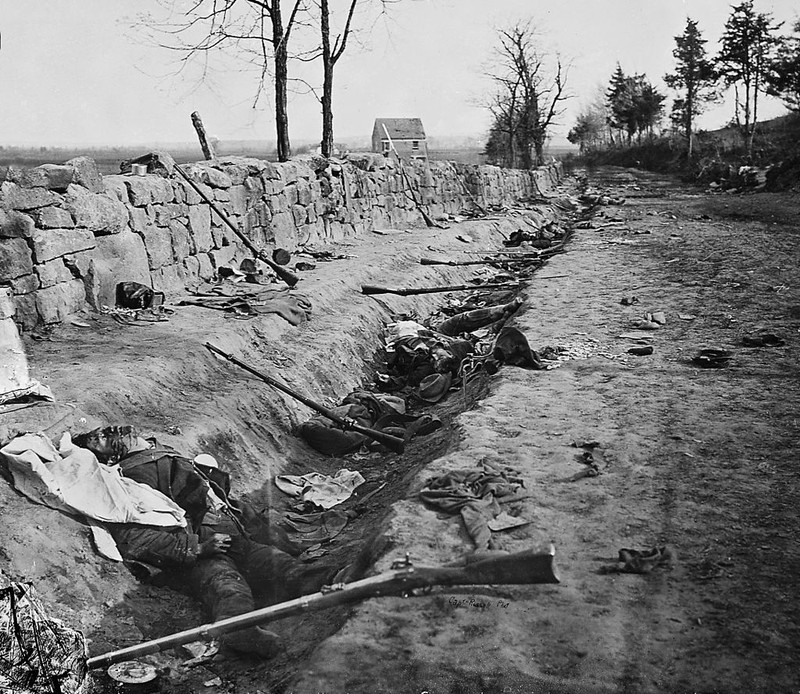
Confederate dead behind the stone wall at Marye's Heights after the Second Battle of Fredericksburg, May 3, 1863 (Matthew Brady, National Archives)
After several attempts at piecemeal attack, Sedgwick coordinated a main assault against the heights (map by Kathleen Thompson)
The combined assault of Newton and Howe's Divisions against the Fredericksburg Heights (map by Kathleen Thompson)

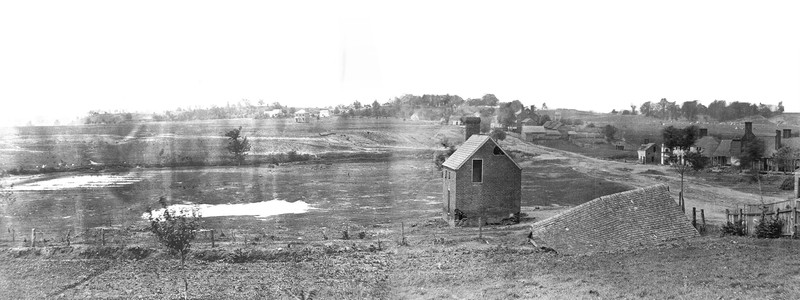
Photograph looking towards Marye's Heights, Hanover Street is at the right of the image (photo taken in 1864)
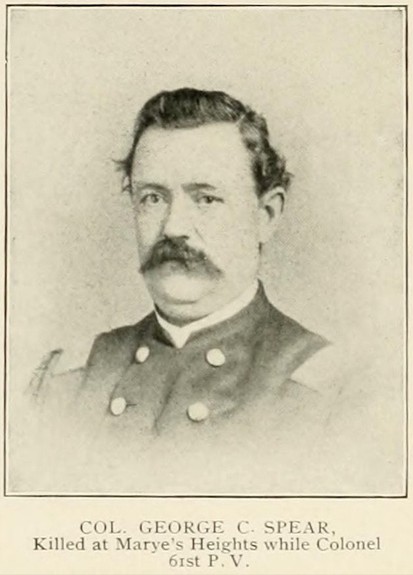
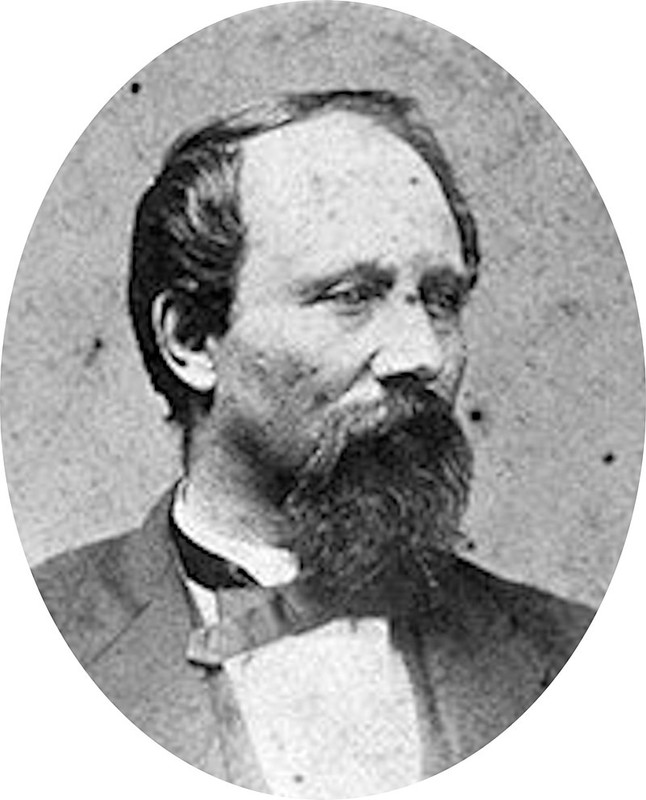
Colonel George C. Spear (image from the History of the Twenty third Pennsylvania Volunteer Infantry, page 248)
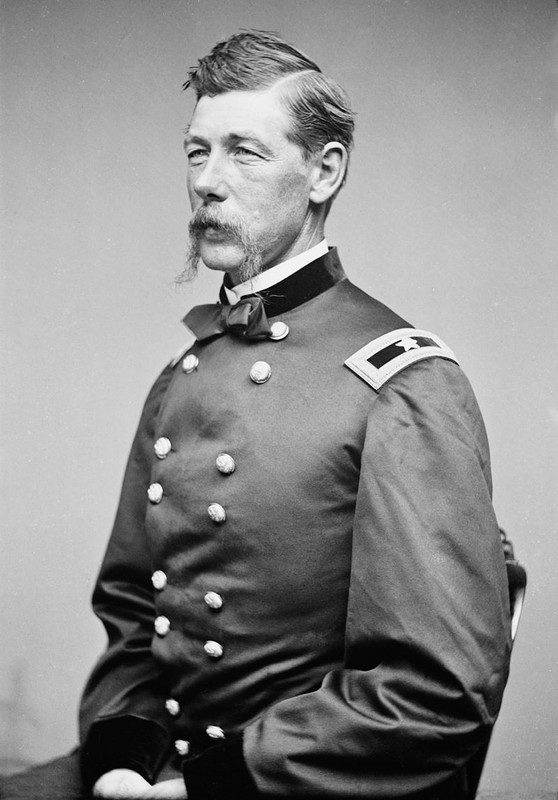
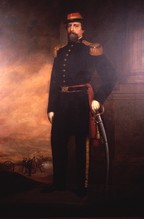
Colonel Alexander Shaler
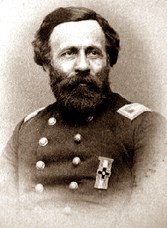
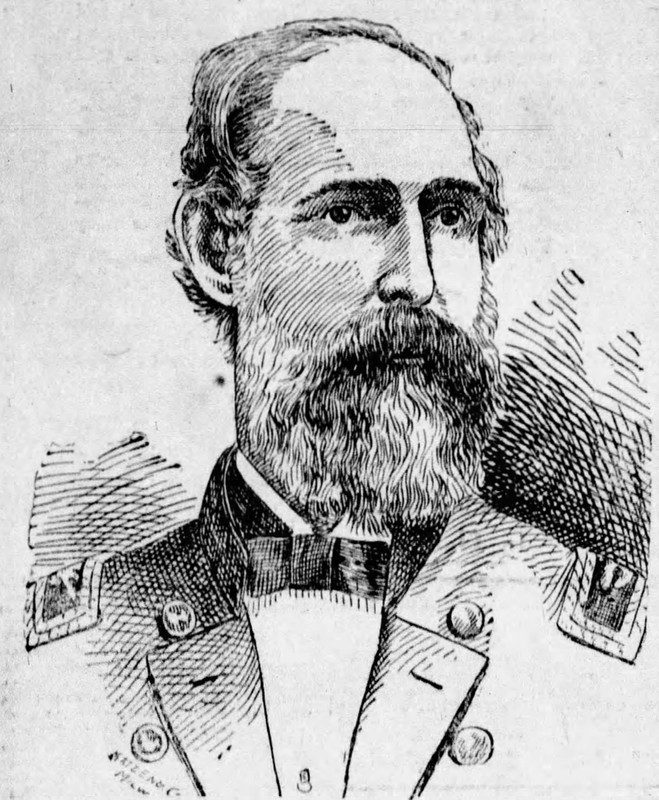
Colonel Hiram Burnham
Brigadier General Thomas Neill
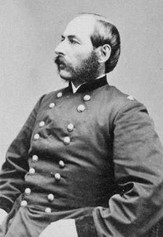
Colonel Lewis A. Grant
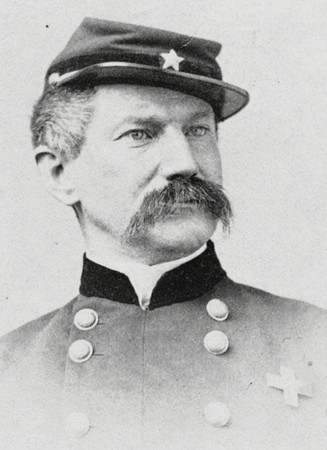
Colonel Thomas O. Seaver (Photographed in 1875)
Colonel James B. Walton who surrendered his guns from the Washington Artillery on Marye's Heights
Colonel Thomas Allen, 5th Wisconsin (sketch in 1905)
"General Haupt and W. Wright, Superintendent of the Military Railroad survey a Confederate Artillery Battery on Maryes Heights, Fredericksburg Va that was wrecked by Union artillery fire May 5, 1863"
_(14739760236).jpg)
Report of Maj. George W. Dawson, 61st Pennsylvania, page 1
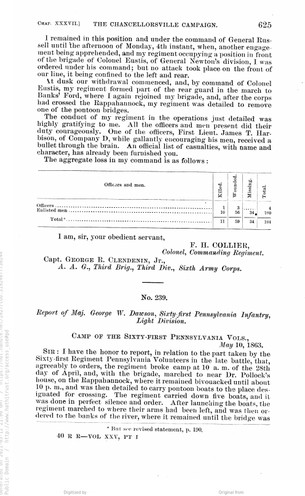
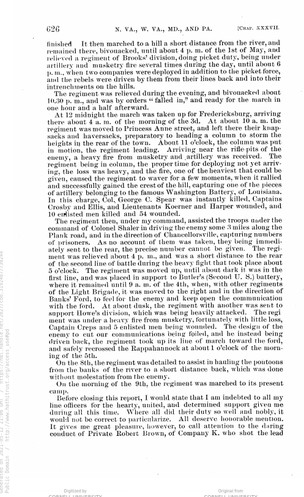
Report of Maj. George W. Dawson, 61st Pennsylvania, page 2
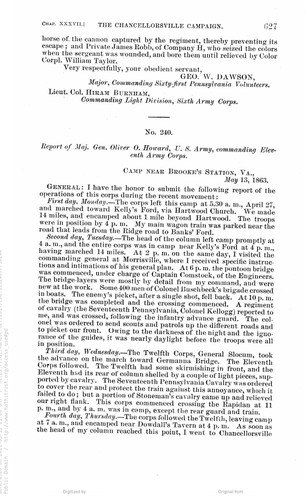
Report of Maj. George W. Dawson, 61st Pennsylvania, page 3
Backstory and Context
Text-to-speech Audio
“Nothing remained but to carry the works by direct assault.” John Sedwick, May 3, approx. 10:00am
With both flanking attempts by Gibbon and Howe stalled and messages from Hooker’s headquarters demanding that Sedgwick hurry up and get to Chancellorsville to attack Lee, Sedgwick turned his focus back to making a frontal assault on Marye’s Heights.
The plan to storm Marye’s Heights consisted of two columns and one battleline moving forward simultaneously from the city of Fredericksburg with the aim to break through the Confederate defense and clear the way to the Orange Plank Road. The first column would advance along William Street, which went over the heights and turned into the Orange Plank Road. This column consisted of Colonel George C. Spear leading the 61st Pennsylvania and 43rd New York, followed by Colonel Alexander Shaler leading the 67th New York and 82nd Pennsylvania. A few streets over, on Hanover Street, was a second column of the 7th Massachusetts and 36th New York led by Col. Thomas D. Johns. Both columns were organized as columns of four. Traversing the open ground before the stone wall and Marye’s Heights was three regiments of Colonel Hiram Burnham’s Light Division (6th Maine, 5th Wisconsin, and 31st New York) along with the 23rd Pennsylvania who volunteered for the assault. The men were all ordered to move forward without capping their guns, meaning the soldiers could not stop and fire their weapons and must move forward to engage with the enemy in close combat.
As the three sets of troops in Fredericksburg prepared to attack Marye’s Heights, Sedgwick sent orders to Howe south of the city to assist in the assault. Howe ordered his troops to deploy into battlelines to storm the heights from the south, while pulling up his artillery to train on the Confederate artillery on Lee’s and Marye’s Heights. Howe’s division formed into three lines: the forward line was the 7th Maine, the 33rd New York, and five companies of the 21st New Jersey commanded by Brig. Gen. Thomas Neill; the second line, commanded by Col. Lewis A. Grant, was the 6th Vermont, 26th New Jersey, and 2nd Vermont; the third line was the remainder of the 21st New Jersey with the 3rd and 4th Vermont, commanded by Col. Thomas O. Seaver. The 77th New York was ahead of the first line as skirmishers, the 20th and 49th New York were held back on the road as reserve, and the 5th Vermont was in support of the artillery guns of Captain Andrew Cowan’s 1st New York Independent Light Battery near the Bowling Green Road.
The attack on Marye’s Heights began around 10:30am as the two columns moved up William and Hanover Streets, followed shortly after by Burnham’s lines moving forward against the stone wall. The columns moved more quickly than Burnham’s men due to marching in the roadways instead of over uneven ground, and they received the brunt of Confederate fire first. The artillery guns on the heights were quickly able to train their pieces on the approaching Federals; the Confederate gunners had held these positions for months since November 1862 and had calculated most of the terrain and ranges. The column moving up William Street was shattered first by artillery fire and infantry fire from the Sunken Road, and those troops sought shelter along the roadway after Colonel Spear fell mortally wounded. The column moving up Hanover Street made it further as the Confederate line behind the wall held their fire until the Union troops were only 25 yards away. Colonel Johns urged his men to keep pressing forward, but his column also sought shelter in yards along the road once he fell wounded.
While both columns stalled, Burnham’s battlelines were still moving forward. Because they were crossing the uneven terrain between Fredericksburg and Marye’s Height (unlike the men in the roads), the lines were moving slower. This meant that the Confederates could focus on stopping the columns first and then switch to focus on the frontal assault against the wall; it also meant that the two sides of the battlefield became disjointed. One the right side of the Union line the men of the two columns were pinned down and threw up a white flag calling for a cease fire. The Union men asked for a cease fire just to gather and attend to their wounded and the commander of the 18th Mississippi, Col. Thomas Griffin, allowed it. Union men who went to gather up comrades and members of the 7th Massachusetts who were behind a fence nearby and managed to work their way closer to the wall realized that there were only two Confederate lines in the road. The position was much less defended than Sedgwick had feared.
At the same time that the one side of the field was under a white flag, the other side of the Union line had no knowledge of the temporary truce and surged forward. Of Burnham’s line the 5th Wisconsin and 6th Maine reached the stone wall and started to fight the Confederate defenders in the road. With Burnham’s lines moving forward, Howe also sent his three lines forward. In the first line (Neill’s) the 33rd New York and 7th Maine charged towards the Confederate line between Lee’s Hill and Marye’s Heights (the 21st New Jersey men were pinned at the railroad embankment). The second line of Grant’s men hit the railroad embankment and lost their battle order as the green troops of the 26th New Jersey broke under fire. As officers of the 26th NJ and neighboring 6th VT got the men back into order, Grant shifted his lines to the right and headed towards the side of Willis Hill. The two Vermont regiments and the remaining 26th New Jersey men made it across Hazel Run and joined up with the left of Burnham’s force, hitting the trenches to the right of the stone wall. On the other end of the Sunken Road, the regrouped 7th Massachusetts charged up Hanover Street and joined the fight in the Sunken Road. Likewise, the column on William Street was rallied by Col. Alexander Shaler and they pressed forward to attack the flank of the Confederates in the road.
The combined attack forced Barksdale’s men out of the Sunken Road and up to positions on Marye’s Heights. The stone wall that had taunted Federals in December was now in Union hands. Even though the Union had gained the stone wall the Confederates still held defenses along the tops of the heights. Federal troops climbed Marye’s Heights to dislodge Barksdale’s remaining force. The artillery pieces of the Washington Artillery and Brown’s Virginia battery kept firing until overwhelmed and captured. Colonel James B. Walton of the Washington Artillery surrendered to Colonel Thomas Allen of the 5th Wisconsin, saying “Boys you have just captured the best battery in the Confederate service.” Next, Brown’s guns were captured (there is a monument to this unit in the National Cemetery on Marye’s Heights).
Sources
Furgurson, Ernest B. Chancellorsville, 1863: The Souls of the Brave. New York: Vintage Books, 1992.
Gallagher, Gary W. The Battle of Chancellorsville. National Park Civil War Series. Eastern National, 2007.
Parsons, Philip W. The Union Sixth Army Corps in the Chancellorsville Campaign: A Study of the Engagements of Second Fredericksburg, Salem Church and Banks’s Ford, May 3-4, 1863. Jefferson, NC: McFarland & Company, Inc., 2006.
Sutherland, Daniel E. Fredericksburg and Chancellorsville: The Dare Mark Campaign. Lincoln: University of Nebraska Press, 1998.
"Second Battle of Fredericksburg." Wikipedia. Accessed May 5, 2021. https://en.wikipedia.org/wiki/Second_Battle_of_Fredericksburg.
Map by Kathleen Thompson
Map by Kathleen Thompson
Hennessy, John. "The eerie ice house at Federal Hill." Mysteries & Conundrums, April 26, 2010. Accessed May 12, 2021. https://npsfrsp.wordpress.com/2010/04/26/the-eerie-ice-house-at-federal-hill/.
"George C. Spear." Find A Grave. Accessed May 5, 2021. https://www.findagrave.com/memorial/7072944/george-c_-spear.
"Alexander Shaler." Wikipedia. Accessed May 5, 2021. https://en.wikipedia.org/wiki/Alexander_Shaler.
"Hiram Burnham." Wikipedia. Accessed May 5, 2021. https://en.wikipedia.org/wiki/Hiram_Burnham.
"Thomas H. Neill." Wikipedia. Accessed May 5, 2021. https://en.wikipedia.org/wiki/Thomas_H._Neill.
"Lewis A. Grant." Wikipedia. Accessed May 5, 2021. https://en.wikipedia.org/wiki/Lewis_A._Grant.
"Thomas O. Seaver." Wikipedia. Accessed May 5, 2021. https://en.wikipedia.org/wiki/Thomas_O._Seaver.
"James B. Walton." Wikipedia. Accessed May 5, 2021. https://en.wikipedia.org/wiki/James_B._Walton.
"Thomas Allen (Wisconsin politician)." Wikipedia. Accessed May 5, 2021. https://en.wikipedia.org/wiki/Thomas_Allen_(Wisconsin_politician).
"Second Battle of Fredericksburg." Wikipedia. Accessed May 5, 2021. https://en.wikipedia.org/wiki/Second_Battle_of_Fredericksburg.
The War of the Rebellion: A Compilation of the Official Records of the Union and Confederate Armies. Series I-Volume XXV-Part I-Reports, page 625. Accessed May 12, 2021. https://babel.hathitrust.org/cgi/pt?id=coo.31924077730244&view=1up&seq=3.
The War of the Rebellion: A Compilation of the Official Records of the Union and Confederate Armies. Series I-Volume XXV-Part I-Reports, page 626. Accessed May 12, 2021. https://babel.hathitrust.org/cgi/pt?id=coo.31924077730244&view=1up&seq=3.
The War of the Rebellion: A Compilation of the Official Records of the Union and Confederate Armies. Series I-Volume XXV-Part I-Reports, page 627. Accessed May 12, 2021. https://babel.hathitrust.org/cgi/pt?id=coo.31924077730244&view=1up&seq=3.